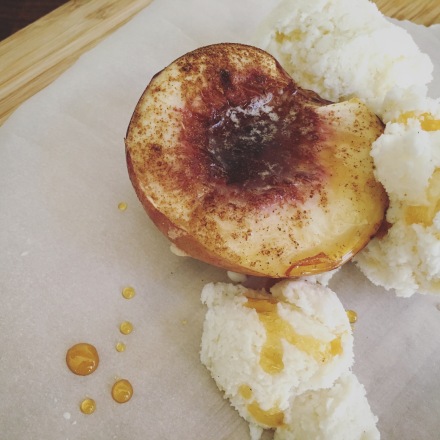
I’ve always felt that writing and concocting food are disciplines that mirror one another. On one hand, you pick up a pen and with one word at a time, you build a feast for the heart and mind, keeping character arcs and plot lines intact, carefully measuring out conflict and raising the stakes, until at last: resolution!
Baking a cake is not so very different. You begin with an idea—a ache for a particular flavor matched to a particular crumb. You count eggs, and level flour. You add dashes of this and that for whimsy, and you let it bake, wafting aromas into the rooms of your home and heart.
When an author friend of mine—Corey Ann Haydu—and I got to chatting one afternoon about writing and baking, love of books, and supporting dreams, a cake dream slowly rose into existence.
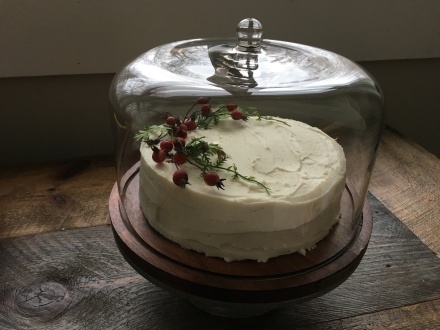
“I’ve written this story,” said Corey. “The main character bakes a cake— olive oil and jasmine with white chocolate pear frosting . . .”
“Tell me MORE!” I begged.
And she did, also sending me an advanced reader copy of her new book Eventown (OUT TODAY—February 12 and available wherever books are sold!) so as to offer the literal backstory on this cake idea.
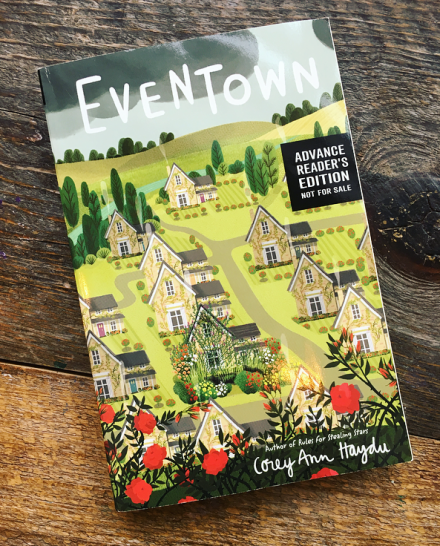
In Haydu’s book, (from the editor) Elodee’s world is tilting and it’s impossible for her to be the same as she was before. Not when her feelings have such a strong grip on her heart. Not when she and her twin sister, Naomi, seem to be drifting apart. So, when Elodee’s mom gets a new job in Eventown, moving seems like it might just fix everything.
Indeed, life in Eventown is comforting and exciting all at once. Their kitchen comes with a box of reipes for Elodee to try. Everyone takes the scenic way to school or work—past row of rosebushes and unexpected waterfalls. On blueberry picking fieldtrips, every berry is perfectly ripe.
Sure, there are a few odd rules, and the houses all look exactly alike, but it’s easy enough to explain—Until Elodee begins to ask questions about Eventown that no one seems to be able to answer.
Everything may be “even” in Eventown, but is there a price to pay for perfection—and pretending?
And so, Elodee’s Dream Cake fell from the page and into reality, both here on my blog, and under the careful hands of Corey and her editor as they put their imaginations, baking prowess, and my recipe to the test (link to that video coming soon!)
But we all know that reality is fraught with as many twists and turns as fiction, and so this real version of Elodee’s cake is gluten free so as to accommodate some dietary needs. After experimenting with innumerable flours, editing measurements, and revising baking times and temperatures, I’m happy to share Elodee’s Dream Cake with you!
Be sure and grab a copy of Eventown before you serve yourself a slice. Because nothing goes with a good story quite like a good piece of cake.
Cheers!
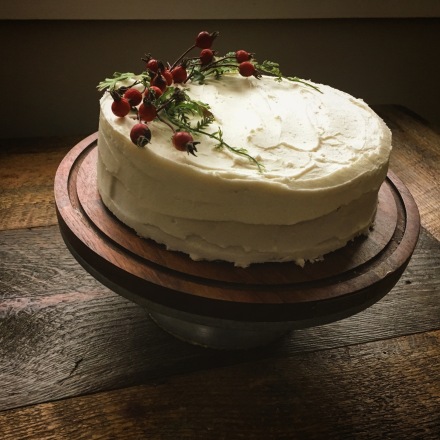
Elodee’s Dream Cake
Olive Oil and Jasmine with White-chocolate- pear Frosting
(Gluten Free)
Cake Ingredients:
8 Tablespoons of extra virgin olive oil
1 Cup of sugar-in-the-raw
2 Eggs
2 Tablespoons of baking powder (yes, tablespoons) *
½ Teaspoon of salt
½ Cup plain Greek yogurt
1 Teaspoon Jasmine flavoring (a liqueur also works here, I’ve substituted Cointreau with excellent results).
¾ Cup of white rice flour
½ Cup tapioca flour
1 ½ Cups oat flour
* A note on baking powder: For anyone with severe gluten allergy, or celiac’s disease, you will want to make sure your baking powder is made with corn starch rather than wheat starch.
Frosting:
1/3 Cup white-chocolate chips
2/3 Cup heavy cream
1 baby food jar of pureed pears
½ cup butter, melted
7+ cups of confectioner’s sugar
For the Cake:
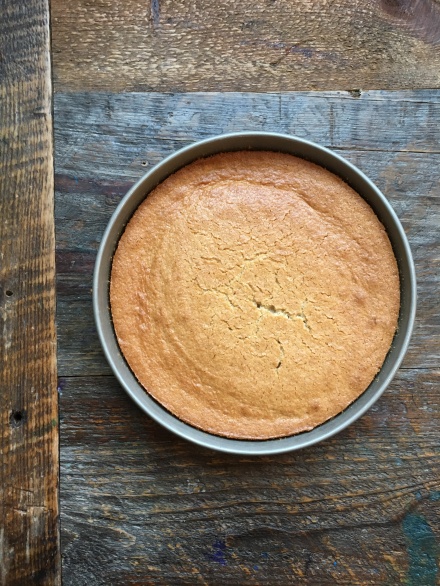
In a large mixing bowl or stand mixer combine olive oil, sugar, and eggs. Add in Greek yogurt, Jasmine flavoring, salt, and baking powder. Mix until well combined. The batter will rise slightly due to the eggs and baking powder. Add the flour into the batter and scrape down the sides of the bowl until the flour is well incorporated, and the batter has an almost fluffy consistency.
In a well-greased pan (gf flour tends to stick to the pan more than standard flour, and I will often add parchment paper to the bottom of a round pan in addition to butter or oil), bake at 350 degrees for 40-45 minutes, or until a toothpick inserted into the cake comes out clean.
If you are making a layered cake, allow to cool before attempting to remove from pan. GF baked goods tend to “set up” more firmly once they have cooled. If you’re making a standard sheet cake, allow to cool before frosting.
*A note on flavorings: Most flavorings and extracts are derived by soaking herbs/spices/florals for a period of time in an alcohol base to “extract” their essence into the alcohol. With floral extracts, especially light florals like jasmine or rose, the flavor can be incredibly subtle and difficult to detect over the flavor and sent of the alcohol it was extracted with. Feel free to experiment with different brands or substitute a liqueur.
*A note on flour
There are many gluten-free mixes of flour on the market and even gf cake-flour mixes if you’d rather not mess around with finding three different types of flours as this recipe calls for. I was looking for a particular nutty flavor, which the oat flour provides in my flour mixture, but experimentation is the best part of baking—try your own flour blends and have fun!
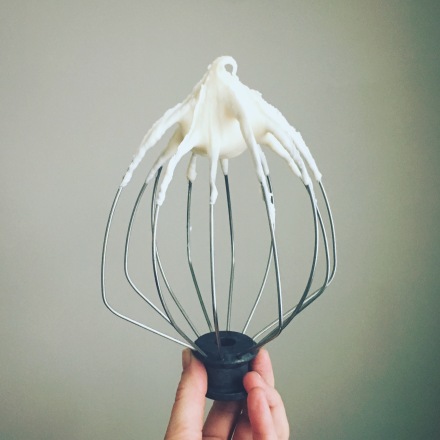
For the Frosting:
Melt the white-chocolate chips and butter in a double boiler or in the microwave, and blend with a fork until well incorporated. With a stand mixer or hand beater, blend in the pears and the heavy cream. Once mixed, slowly add in the powdered sugar one cup at a time until the frosting takes on weight and consistency. It should form peaks that do not readily fall, and if you lift your beater or mixing wand from the bowl, the frosting should keep its shape on the end of the mixing implement.
*Notes on frosting a layered cake:
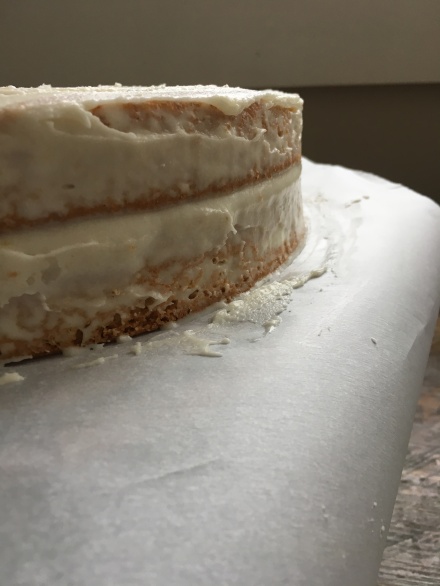
Once my cake layers have cooled and have been removed from the pan, I set them on a cake stand, spread a generous layer of frosting between the layers, and then scrape a “crumb layer” of frosting over the entire surface of the cake. This is a light layer of frosting designed to set and keep the crumbly nature of the cake’s surface in tact while I add the finishing layer of frosting. I refrigerate the crumb layer for an hour or so to help it set, and then frost and decorate the cake as I would normally.
A sheet cake does not require a crumb layer.